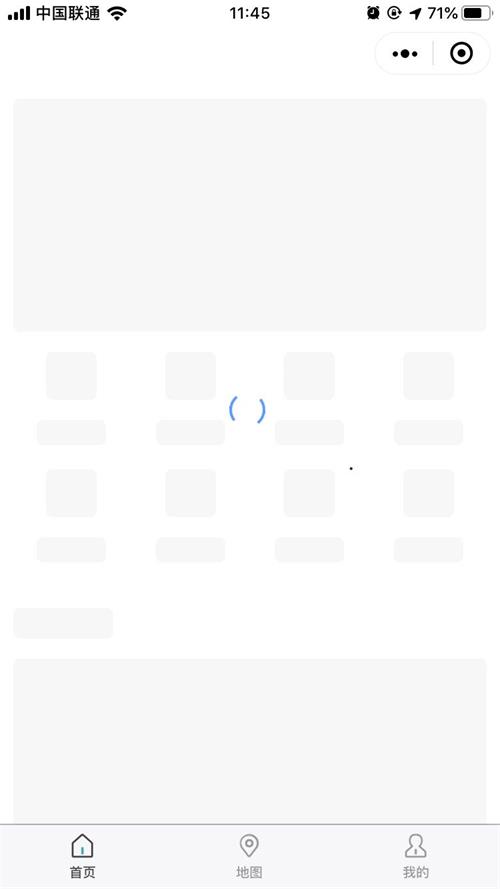
小程序中骨架屏探索
使用
html
// 引入
usingComponents: {
"skeleton": "/components/skeleton/skeleton"
}
<!--引入骨架屏模版 -->
<skeleton wx:if="{{showSkeleton}}" selector="skeleton" loading="{{loading}}"></skeleton>
<!-- 跟节点添加 skeleton -->
<view class="container index skeleton" id="Index">
  <!--需要用到骨架屏的节点 S-->
  <image src="../../common/imgs/icon-golden.png" class="nav-icon skeleton-rect"></image>
  <view class="skeleton-rect">首页导航</view>
  <!--需要用到骨架屏的节点 E-->
</view>javascript
onLoad() {
  this.showSkeleton = false; // 骨架屏显示隐藏
}showSkeleton用来控制骨架屏的隐藏和显示;
原理
获取到DOM节点和样式,覆盖样式,生成灰色块盖在原有文本、图片等节点上面。
javascript
wx.createSelectorQuery().selectAll(`.${this.data.selector} >>> .${this.data.selector}-rect`).boundingClientRect().exec(function(res){
  that.setData({
    skeletonRectLists: res[0]
  })
});wx.createSelectorQuery().selectAll选择匹配选择器 selector 的所有节点boundingClientRect节点的布局位置的查询请求。相对于显示区域,以像素为单位。其功能类似于 DOM 的 getBoundingClientRectexec执行所有的请求。请求结果按请求次序构成数组,在callback的第一个参数中返回。
html
<view wx:for="{{skeletonRectLists}}" wx:key="{{index}}" style="border-radius: 10rpx;width: {{item.width}}px; height: {{item.height}}px;position: absolute; left: {{item.left}}px; top: {{item.top}}px">
</view>